That is what my intent was but...
... that takes alot of time that, I guess, I didn't want to spend documenting the process. It wouldn't have been much documenting since, it was all just an experiment anyway. I didn't remember how I inletted the previous guns (Crosman 1377s) that I did and this one was trial and error. I do know now how I would attempt another gun but, I will probably forget how by the time I ever get around to it again!
Since that is most likely the case, this is what I have done and where it is right now, without much detail.
The pump arm is complete, finish and all! Since I just made one for my son's 1377, it was a very quick process to make this one.


Next was the butt stock.
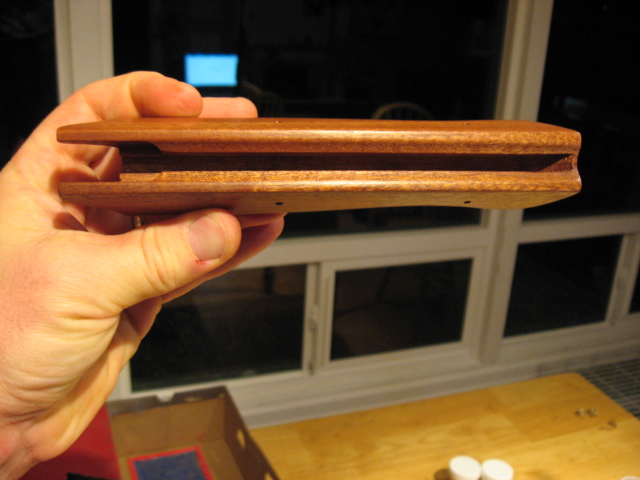
Inletting was done with the router table and fence using 1/2" and 1/4" straight bits. I routed the channel for the grip handle to fit in as deep as I could using these bits and then switched over to a 1/4" wide bench chisel for the rest of the work.
The fit between the wood and metal turned out fantastic! It is really snug with no slop in the fit as far as movement but the chisel work was really rough and the metal and wood on the inside didn't make full contact the whole area. They do make contact where it is important to make a good fit but I wasn't satisfied with that so I got a glass bedding kit for rifles from The Sportsman's Warehouse. We have a store located locally.
I glassed the area along the back of the grip to help ensure that the fit will remain snug for a loooooong time. I just got finished putting the action into the stock with the bedding compound in it right before writing this post. The instructions say to let it cure for 24 hours before separating the action from the stock. I sure hope that the release agent works! Otherwise I just epoxied the action into the stock... FOREVER!
Here it sits until time to separate them. You can also see the shaping that I have done on the stock so far. I really like how this little gun is turning out.

The white stuff between the steel and the wood is the bedding compound (epoxy).


Also are some pictures of the barrel that I chopped to 16" and recrowned. I sanded on it while spinning in a drill to make a smoother finish on the metal. It was pretty rough. I reblued it with cold blue from a bottle (Birchwood Casey Perma Blue). I think that it turned out really nice!

I was also able to install the Crosman steel breech kit (part # 1377SBPK) along with the new longer barrel (the barrel is from a 1760 for .177 cal and has to be ordered over the phone, at least that is how I had to do it. The part # is listed on the parts diagram. Part # 1760-001).
I also polished the trigger sear surfaces, lightened the trigger spring and added a spring guide to it. I removed the paint from the trigger and polished it to a mirror shine just for some flash!
Before

After... I also cut the front sight off right after this picture was taken. A 4x power scope will be mounted on this gun.

Shiny trigger!

I may have to attempt to make a shiny steel safety button! That dull black plastic one just doesn't fit with that trigger! ;)


