
Mrs. P likes to take pictures with her camera. She belongs to an online group that has photo themes where they have a subject like, clouds, and the members that want to participate, turn in a photo that fits the theme title and then they get to vote on the ones they like best. A winner is determined and everybody has a good time sharing their photos with the group.
One of the themes coming up is a "sweets" theme. Mrs. P wanted to make a cupcake and decorate it really fancy and take a picture of that for her entry. She came up with the idea of a small stand to display the cupcake on for the photo.
Of course, who does she go to for such a thing as a cupcake stand? That's right, her knight in shining armor. Since he wasn't there, she came and asked me if I could turn one on the lathe for her! Ha ha
Here is the process that I went through to come up with this cute little stand.

First I selected the material I was going to use. I chose some madrone that I had.

Next I cut it to length and ripped the column to width. You can see how the three pieces will go together in the finished piece.

I used the screw in the chuck to mount a waste block to. I had to get another piece to stack with it because it wasn't thick enough to true the face without running into the screw.


Trued up with extra spacing behind it.
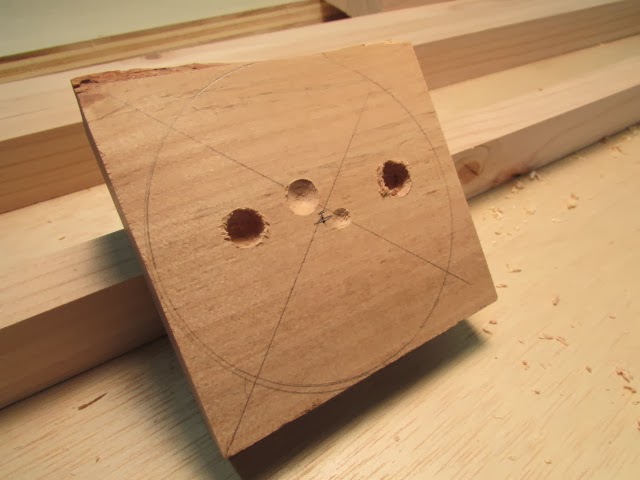
Top tier with center marked and then I cut the circle out so there was less wood to cut away at the lathe.

Top tier hot glued to the waste block and the tailstock brought up to the work piece for support.

The work piece trued and revealing a check in it.

I hit it with some thin CA glue to keep it together.

Next, I cut a mortise into the bottom of the top to reverse mount in the chuck by expanding (opening) the jaws.


I drilled a 3/8" hole to receive the tenons of the column that I will turn later.

I removed the work piece and the waste block and separated them by prying them apart. Man that hot glue sure does hold well! You can see the wood from the waste piece that broke off when prying them apart.
I guess I forgot to get some pictures of the next step but I did true the piece after mounting with the jaws. I turned to shape and burned a couple of lines around the bottom edge for detail.

On to the foot of the stand. It was pretty simple. I did a friction fit between the chuck jaws and the live center. I trued it up and turned a mortise to reverse it for the jaws to hold on to again.

Here it is reversed and turned to shape. When the lathe stopped, I discovered the edge had torn out some. On to plan "B".

I finished turning the top side of the foot and drilled a 3/8" hole that will receive a tenon on the column.

I had this waste piece left over from a previous project and used it to reverse mount the foot using the hole.

Mounted and ready to bring the tailstock up for support.

Supported and ready for action!

Removed the broken edge.

Used light cuts here to remove the extra support material. Only the friction of the dowel was holding it together.

The completed foot.

The column mounted between centers.

Turned true.

I started with turning two 3/8" tenons on each end that will go into the holes that were drilled in the top tier and the foot.


Here is the final shape of the column.

I glued the pieces together with some CA glue and finished with 2 coats of spray finish. Can't wait to eat those cupcakes!
1 comment:
Now that's real 'sweet' for you to do that.
Post a Comment