Saturday, January 25, 2014

Revisiting an Old Project (not completed)

I have several projects that were started in the past and never completed.  I seem to work on them briefly and then I get distracted with something else or, lose interest.
Why is that? 
I think for myself, there are many reasons but, one reason that keeps coming back is that I am uncertain what to do next. 
Every project is a learning experience for me.  There are many firsts in each of the projects that I  start.  Sometimes, if I am unsure of the next step, I stop and try to figure it out in my mind.  That seems to be the hang up point in my projects.  I take too long of a break and lose momentum going forward.  That is when the projects stops. 
What is the law that says objects in motion tend to stay in motion, or objects at rest tend to stay at rest?
That is me.  As long as I am moving forward, I tend to stay moving forward.  BUT, when I am at rest, I tend to stay at rest. 
That brings me to where I am at right now.  I have 3 projects that I have in the space between my two ears.  One is a hope chest that was for my daughters 12th birthday.  We just celebrated here 15th birthday this month, and that chest STILL isn't completed!
The second project is going to be some storage cabinets that will line one wall in our "school room".  I have purchased most of the materials for this but have yet to get started.  I am actually waiting for the temperature to come up so I can finish the insides of the cabinets before I cut the pieces to size.
The third project is a rifle stock that is for a buddy of mine.  I was looking through some picture files the other day and ran across some of the project photos that I have taken in the beginning of the stock.  They were dated in 2010!  That is 4 years ago and still haven't finished that project.
I set some goals for myself this year but none of them were woodworking goals.  They were spiritual goals and some financial goals.  As I started out this year with making a couple of "quick" projects for other people, I decided that I needed to make some woodworking goals as well.  My goal is to finish those projects that I already started.
Now on to the stock.
I have completed 95% of the work and I have been in the finishing stage for quite some time.  I picked up the stock and brought it in the house to a warmer environment to work on.  I have some fine sanding in areas on the stock to do and I also had some gaps on the grip cap that needed to be dealt with.
I taped off the areas that needed filling and mixed up some 5 min epoxy to fill the gaps. 


This is a cross made from quarter sawn sycamore and ebony background.  The epoxy will fill those gaps and I will sand the extra off, leaving the surfaces level with each other.  When the final finish is applied, the surface should have a uniform level and sheen to it, hiding the imperfections of the pieces fit to one another.


There was also a gap on the side of the cap that needed filling.  Same thing here. 


Also one spot under the raised cheek piece where a small knot was.  After these areas are cured and sanded down, I will continue to sand some of the areas where the previous coats of finish (Waterlox) got a bit thick and shiny.  Then I will wipe the dust off and continue to hand rub more finish onto the wood, building it to the desired depth.  I am planning on deglossing the final coats and then waxing to a satin sheen. 

This is a piece of black walnut and it will be for a Beeman R9 air rifle.

Hopefully, this project will be completed by the end of February.  I want it to cure for at least a couple of weeks before I ship it off to Texas.

Saturday, January 18, 2014

I Scream, You Scream, We All Scream For ICE CREAM!


Yay for ice cream! 

I know, it's January and here I am talking about ice cream.  We have a daughter that is turning 15 this month and one of her requested birthday gifts is a turned ice cream scoop.  Well, what daughter wants, daughter gets.  Within reason anyway.  I don't want to be held responsible for raising unproductive, dependent on someone else (or the govt.) citizens.  :)

There were a couple of choices that I was aware of for choosing a scoop.  One was from Rockler and the other was from Woodcraft.  I chose the scoop from Woodcraft (Wood River Brand) because it was the most convenient for me to purchase.  (The store was closer).  I also had a 10% off coupon for Woodcraft so that was a bonus.  I even picked up the pizza cutter kit so I could turn a handle for that.  (I will save that project for another post)


I decided on maple and black walnut for the handle.  The colors reminded me of chocolate and vanilla.  What better combo for an ice cream scoop?


This is cutting a chunk of walnut to length.


Here it is being ripped to width.


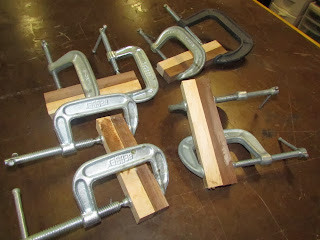
I am making two blanks, for two reasons.  First reason is just in case I mess up the first one on the lathe and the second reason is if the first blank turns out just right, I have a second one made up and can be used to turn the handle for the pizza cutter!  


Here is how they will be glued up in alternating woods. 


The first step in gluing the blanks together.


Clamps removed, halves jointed on one face to even them out and then the jointed faces are glued together.


Now with the blank glued up, I cut each one into 3 sections lengthwise and turned the middle section 90 degrees so that the colors alternated to make up a checkerboard pattern.  I glued them back together to make the blank that you see below.  I was concerned about the strength of the end grain to end grain glue up, especially since it is going to be used as an ice cream scoop handle.  Sometimes that ice cream can be frozen pretty hard and a lot of pressure is exerted on the scoop.

To add some strength, I decided to drill a hole that would go through all three sections and to glue a hardwood dowel in the hole.  


I mounted the blank in the chuck on the lathe and got the bit sized for the dowel that I was using.  (3/8")
I started with a bit in a chuck on the tailstock and went as deep as it would go.  I then switched over to the handheld depth drill and finished the rest of the hole to the depth that I wanted.  


Hand held depth drill marked to the desired depth with some tape.


Here I am showing how far the bit will be in order to go through all three sections of the blank.  I have the profile of the handle drawn on the blank to be sure that I don't drill all the way through and have the dowel exposed on the end when finished turning.


Drilling the hole with the bit in the tailstock.  Finished drilling to final depth with the hand depth drill.


The hole is complete and below is the dowel that will be glued in.  Just getting the fit right with some sanding and marking the length.  The dowel is cut about 2" shorter than the hole to allow for the tang on the scoop to be epoxied in.


Now we are getting down to business!  Finally I have the blank prepped and ready to be turned.  It would have been easiest to chuck the blank and start turning.  I didn't make the blank long enough to account for some waste at one end so I had to come up with a way to use as much of the blank as possible.  (After the handle was turned, I realized that I could have chucked it and only lost about 1/2"-3/4" of overall length and it would have been just fine)


I have a waste piece mounted on the screw.  I am drilling to glue a piece of dowel in the hole.  The dowel will take the blank with the hole.


The dowel glued in.  Just cut it off about 2" so it will completely insert into the blank.


This is what it looks like mounted to the dowel.


Move the live center up and get it centered and supported to start turning!


Now the fun begins!  Let the shavings fly!


Turned round.


I started with the ferrule end (the end with the hole).  One nice thing with using this mounting method is that I could easily take the blank off and put it on again and have it perfectly centered every time with no effort.  The hole and dowel are exactly the same every time and the dimple made by the live center is too.


Here is a test fit of the ferrule.  Just right!


A test fit of the scoop to be sure it will fully seat with the ferrule in place.  Time to remount and turn the rest of the profile.


The profile is complete and time to finish turning the end.  This got a little tedious removing the nubbin off of the end of the handle.  There isn't much support just fitted on the dowel.  I started to try and make light cuts but there was too much chatter and the end was all over the place.  I didn't want to risk a mishap at this point so I just cut the nubbin off with a small hand saw and then filed the shape.  I finished sanding on the lathe and used my hand to support the end while it was spinning.


All done!  There is still just a little dimple in the end where the point of the live center was but it isn't really noticeable enough to be a distraction.


Now the scoop and ferrule are epoxied on and left to cure.  Now to mask off the scoop end and spray with some canned finish.  


Happy Birthday April!


Monday, January 13, 2014

Gearing Up

I have been gearing up to start a new project for the house.  I want to build some cabinets for storage in our "school" room.  We don't have much storage/closet space in our 1930 house and with 10 people living in it, there is A LOT of stuff!


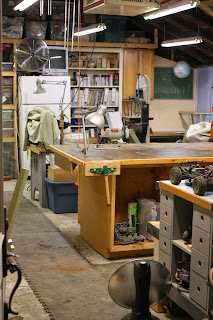
The main thing that has had to happen in order for me to get ready for this has been to get the shop cleaned up so I can move around in it without tripping on something or having to clear a spot on the workbench in order to simply set something down.  The shop became the dumping grounds last summer while I was trying to paint the exterior of the house.  Things simply got piled up and left that way. 


Now that the shop is in working order, (notice I didn't say perfect order ;) ) I will be able to start breaking down the sheet goods for the cabinet cases.  I am thinking that I may want to apply some finish to the side of the plywood that will end up being on the inside of the assembled cabinets.  I can apply the finish to the whole 4x8 sheet and then cut the pieces after it has dried.  I plan on using simple pocket hole joinery for the construction of the cases. 


In the meantime while I am waiting for the right time to get started applying some finish, I have been enjoying carving another spoon! 


These are the tools of the trade.  A crook knife (as seen in the last post) and the simple folding pocket knife used to carve the shape.  My birthday is coming up soon and I have put in a request for a couple more carving knives.  Here are two links to the knives that I am hoping for.  1.9" blade  3.2" blade


The spoon is black walnut from a tree in the yard.  See how the wood looks kind of hazy?  We used it tonight to serve guacamole and after it was washed, the grain raised and was rough.  I sanded it just before I took these two pictures, that is why it looks light.


Also, the kids were given some rocks from my grandma and they had a black light that was given to them from their grammy so they were looking at the rocks in the dark and having some fun seeing how their white clothes and teeth glowed!  Fun stuff!


Christopher was brushing his teeth in the dark with his light up toothbrush, so I took a psychedelic moving image in the mirror!


Tuesday, January 7, 2014

Spoon Carving Knives


I was the fortunate reciever of one each of these carving knives for Christmas! 


I have been watching a lot of spoon carving videos on Youtube and I really wanted to try carving a spoon bowl out with one of these crook knives.  I have carved out some spoon bowls on some other spoons that I have made but I used a gouge to do it.  Its not difficult to use the gouge, I just wanted to try something different and using the knife vs. the gouge appeared to be simpler.  After using the crook knife, I would agree to the previous statement.

Most people know that a sharp tool is easier and safer to use.  It is true and that applies to these knives as well. 

Out of the box, or should I say bag (they come wrapped in paper in a clear plastic bag), they are useable but NOT sharp.  Not really a big deal because, usually, cutting edged tools don't come honed and ready for use straight from the distributor. 

Since the cutting edges are not straight, but curved, I was a bit unsure how to best go about sharpening and honing them, getting them ready for some cutting.  I went to Youtube again to see how others have gone about this procedure.  I found a really helpful pair of videos from Ben Orford showing how he goes about sharpening his crook knives. 

Pt 1 here          Pt 2 here
 
Here I tried to get a picture of the honed edges but was too impatient to get a good image.


 Also I tried to show how rough the back of the blade was.  It's a bit blurry to really see it.  It doesn't affect the cut at all but it would have been an easy grind at the factory and would make a better initial impression of quality.
   
I used the crook knife to carve the bowls on both of these spoons.  I did sand the bowl lightly to get rid of some tear out but the tear out was due to operator error (getting used to using the knife) rather than the tool itself.


Overall, for the money invested, these knives will suit me well.  It would be nice to say that I had a custom forged crook knife.  For what I do, these knives are money well spent.  I do not carve out spoons for a living, just for fun and use around the house.  Both of these knives feel nice and stable in the hand.  The handles are wood so, if one would so desire, you could always shape the handle to your personal liking or you could make a custom handle for it.
    
I would recommend these knives as a good entry point tool for spoon carving.  They will give a good cut with a bit of sharpening out of the box.  The price is right on.


Wednesday, January 1, 2014

Happy New Year! 2014

Just a couple of projects to share here at the start of this new year of 2014!

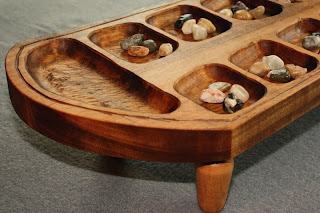
I have made two gameboards that were given away as Christmas gifts.

The game is called Mancala.  The rules are simple and there are many variations to the game.  Here is a link to the way we like to play.  The only difference is that we like to use 4 stones in the cups, not the three mentioned.

This first board is made from Madrone.


This second board is made from Sapele.


Overall, these are pretty quick and easy projects to make.  I used a box core bit and routed the cups freehand on both boards.  I actually like the uneven edges of the cups.  I turned the legs for each on the lathe.  Most store bought boards don't come with legs and can usually be folded in half for easier storage.  I made these to be played on and displayed on a shelf when not in use.  Sort of like a usable decoration.
 
The madrone board was finished with Watco dark walnut danish oil finish and the sapele board was finished with boiled linseed oil (BLO).  The game pieces are decorative rocks purchased from the craft store.